The Production Process of Stainless Steel Thermos Cups
Stainless steel thermos cups have become an essential item in our daily lives, keeping our beverages hot or cold for extended periods. But have you ever wondered how these remarkable cups are made? In this article, we will take you through the intricate production process of stainless steel thermos cups, from the selection of raw materials to the final product ready for use.
1. Raw Material Selection
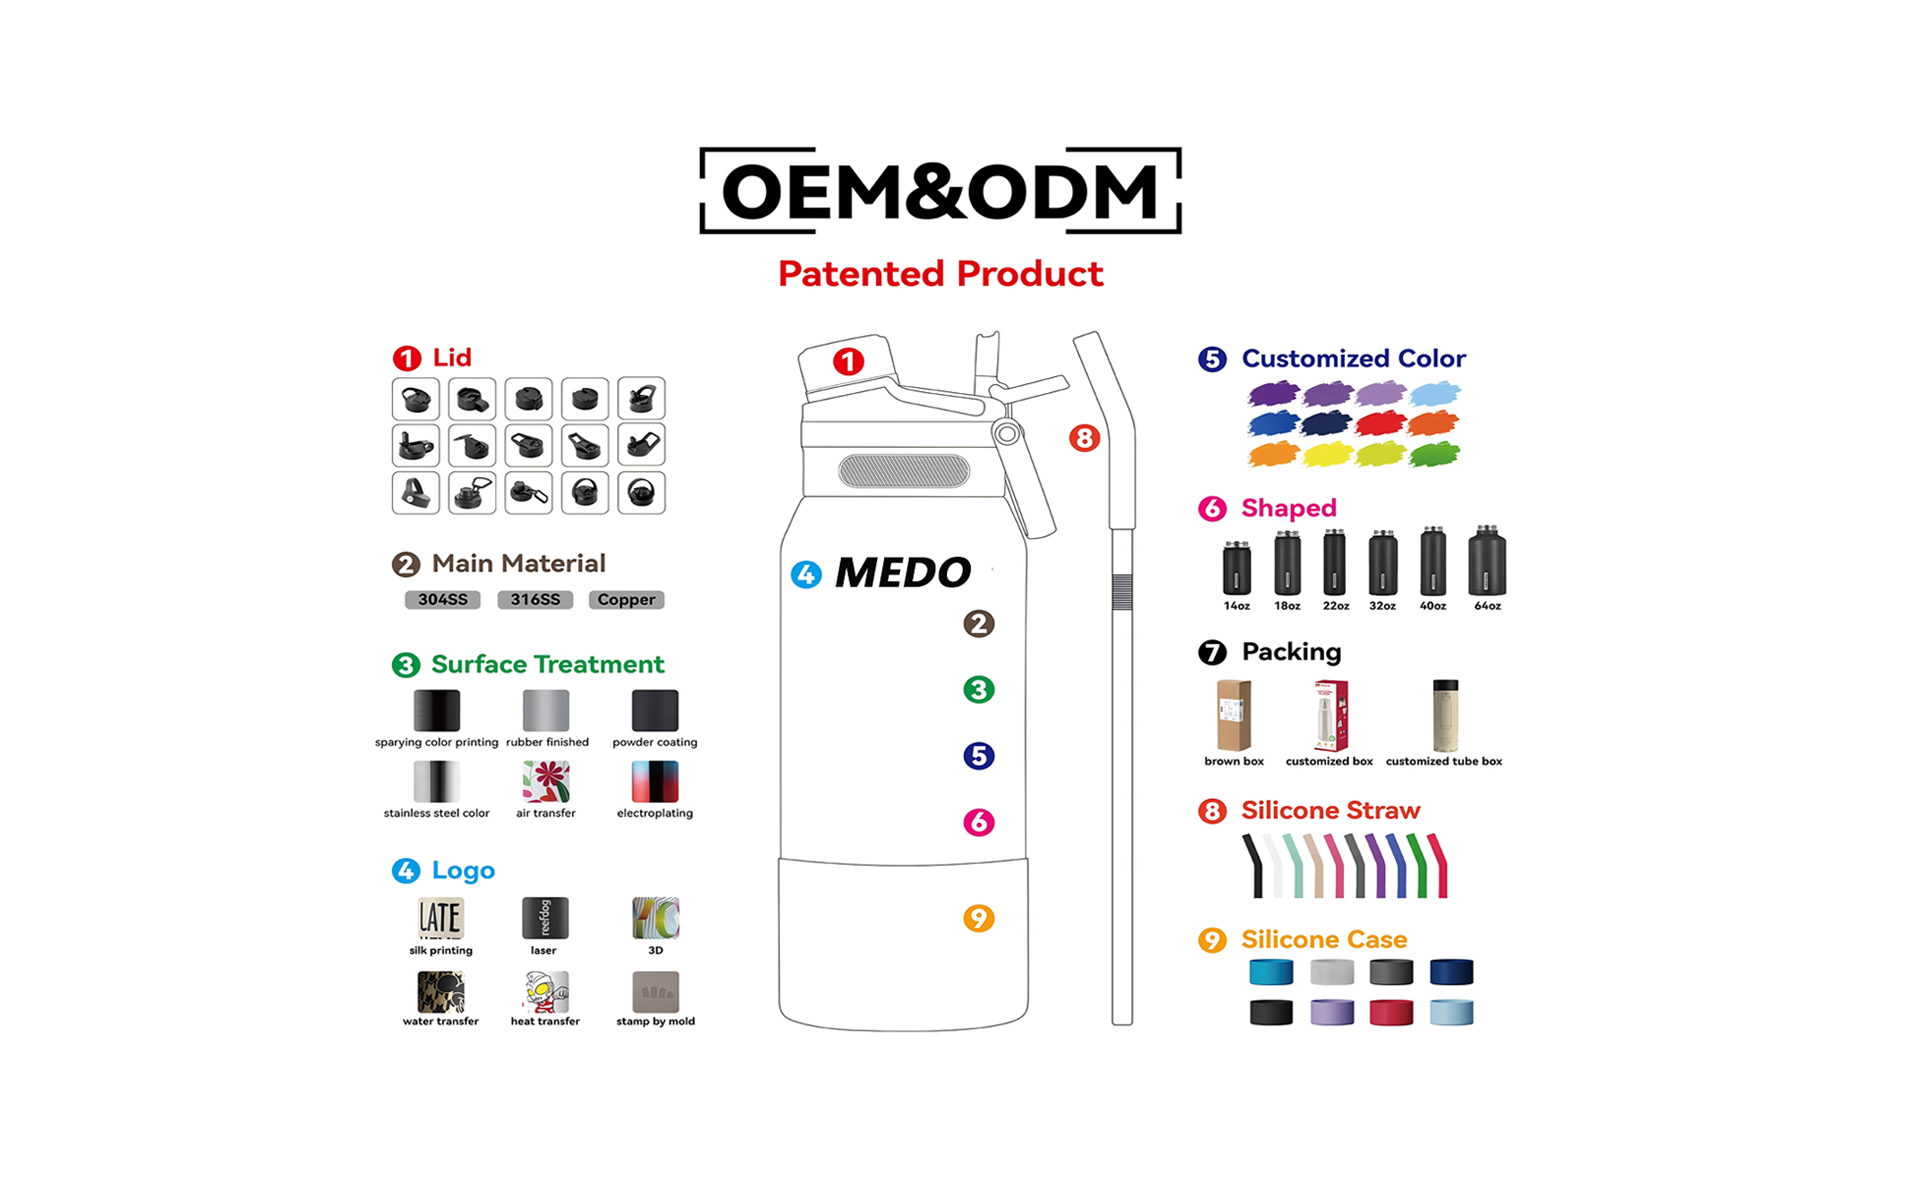
The journey of creating a high-quality stainless steel thermos cup begins with the careful selection of raw materials. The primary material used is stainless steel, renowned for its durability, corrosion resistance, and heat retention properties. For the inner and outer shells of the thermos cup, food-grade stainless steel is preferred. 304 stainless steel is commonly used, offering excellent corrosion resistance and being safe for contact with food and beverages. In some high-end thermos cups, 316 stainless steel may be employed, which has even better corrosion resistance, especially in harsh environments, and is also more resistant to pitting and crevice corrosion. This makes it ideal for applications where the cup may be exposed to acidic or salty substances.
In addition to stainless steel, other materials are also crucial components of the thermos cup. The lid often contains plastic and silicone elements. High-quality plastic is used for the outer part of the lid for its lightweight and easy-to-mold characteristics, while silicone is used for the gasket to ensure a tight seal, preventing leaks and retaining heat effectively.
2. Shell Processing
2.1 Outer Shell
Water Expansion: The cut pipes are subjected to water expansion. In this process, water is injected into the pipes under high pressure, causing the pipes to expand and take on the desired shape. This helps to form the basic shape of the outer shell of the thermos cup.
Bulging: Using a press machine, the segmented parts are further shaped through a bulging process. This gives the outer shell its characteristic curved shape, enhancing both its aesthetics and functionality.
Cleaning and Drying: The processed outer shells are thoroughly cleaned to remove any oil, dust, or debris from the manufacturing process. They are then dried to ensure that no moisture remains, which could affect the subsequent processes.
Inspection and Pit Knocking: Each outer shell is carefully inspected for any defects, such as pits or dents. If any are found, they are knocked out to ensure that the outer shell is of high quality. Only those outer shells that pass this inspection are considered qualified for further processing.
2.2 Inner Shell
3. Assembly Process
3.1 Cup Mouth Assembly
The inner and outer shells are first carefully aligned at the cup mouth. This step requires precision to ensure that the two shells are evenly matched, as any misalignment could affect the overall appearance and functionality of the thermos cup.
3.2 Welded Junction
The joint between the inner and outer shells at the cup mouth is then welded. This welding process must be precise to create a strong and seamless connection. Laser welding is often used in modern thermos cup manufacturing as it offers high precision, a narrow heat - affected zone, and can produce a smooth and strong weld. This helps to enhance the durability and aesthetic appeal of the thermos cup.
3.3 Pressing Midsole
A midsole is pressed onto the welded joint. This midsole not only provides additional support but also helps to improve the insulation performance of the thermos cup by reducing heat transfer through the side walls.
3.4 Bottom Welding
The bottom of the thermos cup, where the inner and outer shells meet, is welded. This welding is also crucial for ensuring the integrity of the cup and preventing any leakage from the bottom. The weld is carefully inspected to ensure that it is strong and free from any defects.
3.5 Inspecting Welded Junction and Bottom Welding
After the welding processes, both the welded junction at the cup mouth and the bottom welding are thoroughly inspected. Visual inspection is carried out to check for any visible defects, such as cracks or uneven welds. In addition, non - destructive testing methods, such as ultrasonic testing, may be used to detect any internal defects that are not visible to the naked eye. Only thermos cups with flawless welds are passed on to the next stage.
3.6 Spot Welding Getter of Midsole
A getter is spot - welded to the midsole. The getter is a material that helps to absorb any remaining gases inside the vacuum - sealed space of the thermos cup, improving its insulation performance over time.
3.7 Vacuumizing
The assembled thermos cup is then placed in a vacuum chamber. Through a process of vacuumizing, the air between the inner and outer shells is removed. This creates a vacuum layer, which significantly reduces heat transfer by conduction and convection. The quality of the vacuum is crucial for the thermos cup's insulation performance. High - end thermos cups can achieve a very low vacuum level, which helps to keep beverages hot or cold for extended periods.
3.8 Temperature Measurement
After vacuumizing, the temperature inside the thermos cup is measured. This is to ensure that the vacuum has been successfully created and that the insulation performance of the cup meets the required standards. If the temperature measurement indicates that the vacuum is not sufficient, the cup may be re - vacuumized or rejected.
3.9 Electrolysis
The thermos cup is then subjected to an electrolysis process. This process helps to clean and passivate the surface of the stainless steel, improving its corrosion resistance. During electrolysis, the cup is placed in an electrolyte solution and an electric current is passed through it. This causes a chemical reaction on the surface of the stainless steel, forming a thin, protective oxide layer.
3.10 Polishing
The outer surface of the thermos cup is polished to give it a smooth and shiny finish. Polishing not only enhances the aesthetic appeal of the cup but also makes it easier to clean. Different polishing techniques, such as mechanical polishing and chemical polishing, may be used depending on the desired finish. The polishing process is carefully controlled to ensure that the surface of the cup is evenly polished without any scratches or blemishes.
3.11 Second Temperature Measurement
After polishing, the temperature inside the thermos cup is measured again. This is to ensure that the polishing process has not affected the vacuum and insulation performance of the cup. If the temperature measurement shows any deviation from the required standards, the cup may be re - evaluated or rejected.
3.12 Inspection and Polishing (Second Time)
The thermos cup is inspected again to ensure that the polishing has been done to a high standard. Any remaining imperfections are corrected through additional polishing if necessary.
3.13 Pressing Outsole
An outsole is pressed onto the bottom of the thermos cup. This outsole provides additional protection to the bottom of the cup and helps to prevent it from slipping on surfaces. It also gives the cup a more finished look.
3.14 Painting
The thermos cup may be painted to add color and style. High - quality paint is used, which is resistant to fading and scratching. The painting process is carefully controlled to ensure an even and durable finish. Different painting techniques, such as spray painting and powder coating, may be used depending on the desired effect.
3.15 Spot Inspection and Temperature Measurement (Third Time)
After painting, the thermos cup undergoes a spot inspection to check for any defects in the paint job, such as bubbles or uneven coverage. The temperature inside the cup is also measured one more time to ensure that the painting process has not affected the insulation performance.
3.16 Inspection and Painting (Second Time)
The painted thermos cup is inspected again to ensure that it meets the quality standards for both the paint job and the overall product. If any issues are found, the cup may be repainted or further processed to correct the problems.
3.17 Silk Screen Printing
The brand logo, product information, and any decorative designs are added to the thermos cup through silk screen printing. This process allows for precise and detailed printing. The ink used in silk screen printing is durable and resistant to fading, ensuring that the printed information remains clear and visible over time.
3.18 Packaging
Finally, the fully - assembled and decorated thermos cup is carefully packaged. Packaging materials are selected to protect the cup during transportation and storage. The packaging may include boxes, foam inserts, and protective sleeves. The packaged thermos cups are then ready to be shipped to retailers or end - users.
In conclusion, the production of a stainless steel thermos cup is a complex and multi - step process that requires precision, high - quality materials, and advanced manufacturing techniques. Each step in the process plays a crucial role in ensuring that the final product is not only functional but also durable and aesthetically pleasing. Whether you are using a thermos cup to keep your morning coffee hot or your iced tea cold on a summer day, you can appreciate the craftsmanship that goes into creating this everyday essential.
